The long out of print table-top miniatures wargame Heroscape has a cult following across the world, but was not widely supported in the UK, so (particularly here) extra miniatures and scenery items from the add-on modules are rare, and change hands on eBay for large sums of money.
If (like me) you enjoy Heroscape, but would like a cheap and easy way to enhance your table-top with extra scenery items, then this series of articles is for you. I show you how to construct “scatter” scenic items like those pictured above. They fit anywhere using the Heroscape hexagonal base system, and are cheaply and easily made using:
- Some off-cuts of 5 mm foam board
- Thick paper/cardboard
- Black and white acrylic paint
- A hot-melt glue gun
- PVA glue
- A cutting board and craft knife
- My custom “Heroscape Walls & Fortifications” PDF (free download and print).
(1) Low Walls & Fortifications

Download and print the “Low Walls and Fortifications” PDF at A4 size, on heavyweight paper – 200 gsm is ideal.
Cut out around the outer (red) lines.
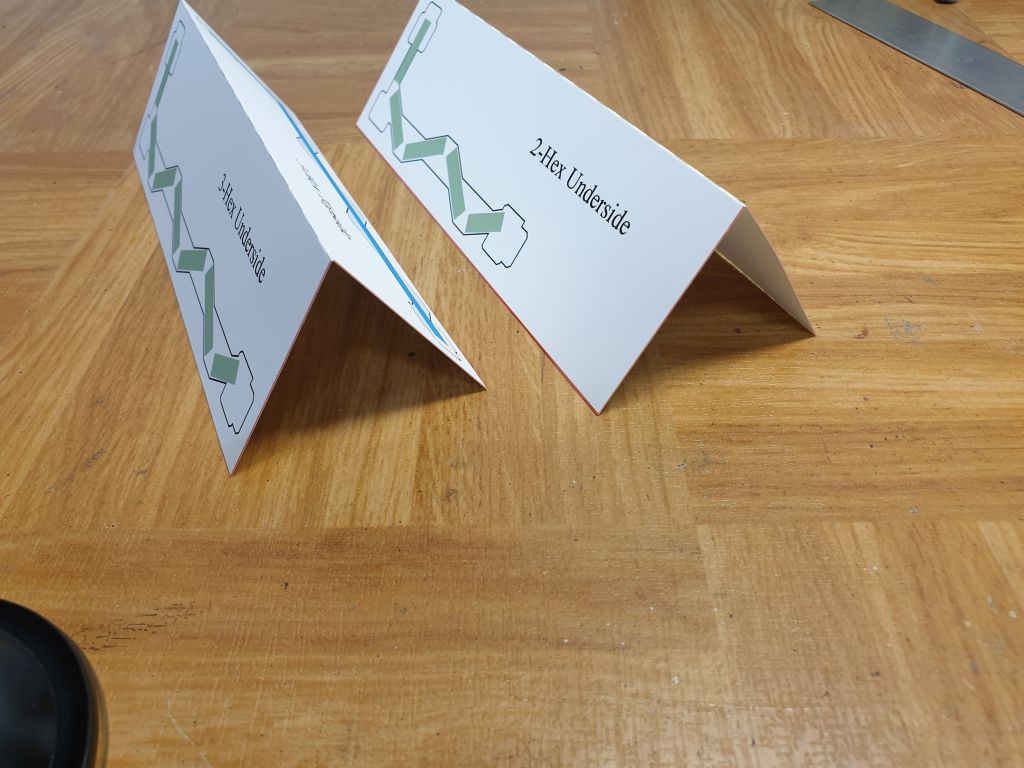
Score along the dashed centre-line, and create a “mountain” fold.

Spread a thin but even layer of PVA glue on to the rear (plain) side of the foundation template, then re-fold to bring the sides back together.

It can be useful to put the cards in between two bits of scrap paper, place on a level surface and add weight (e.g. a pile of books).
This will help to ensure that the cards remain flat as the glue dries.
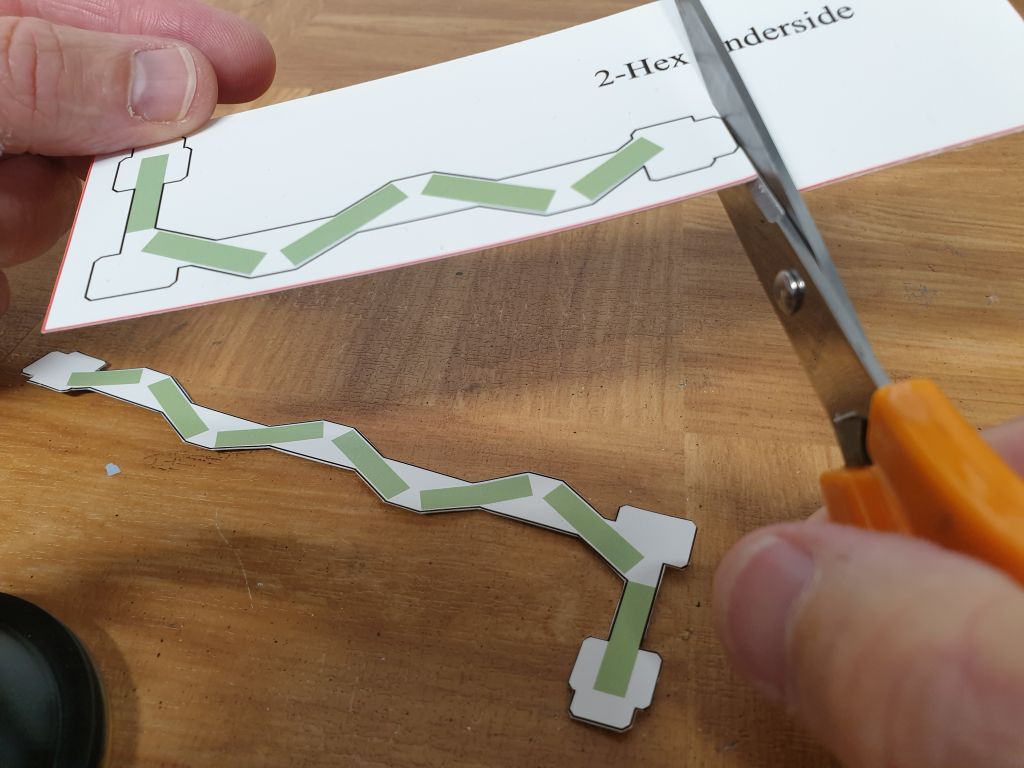
Once the glue is thoroughly set, carefully cut out the foundation following the black lines.

The individual footings need to be cut to 20 mm long by 5 mm wide. A thickness from 1.5 mm works well.
You can use plasticard, thick cardboard or balsa wood for this.
Alternatively, a scrap of vinyl floor tile works quite nicely. It has the advantage of being already adhesive on one side.
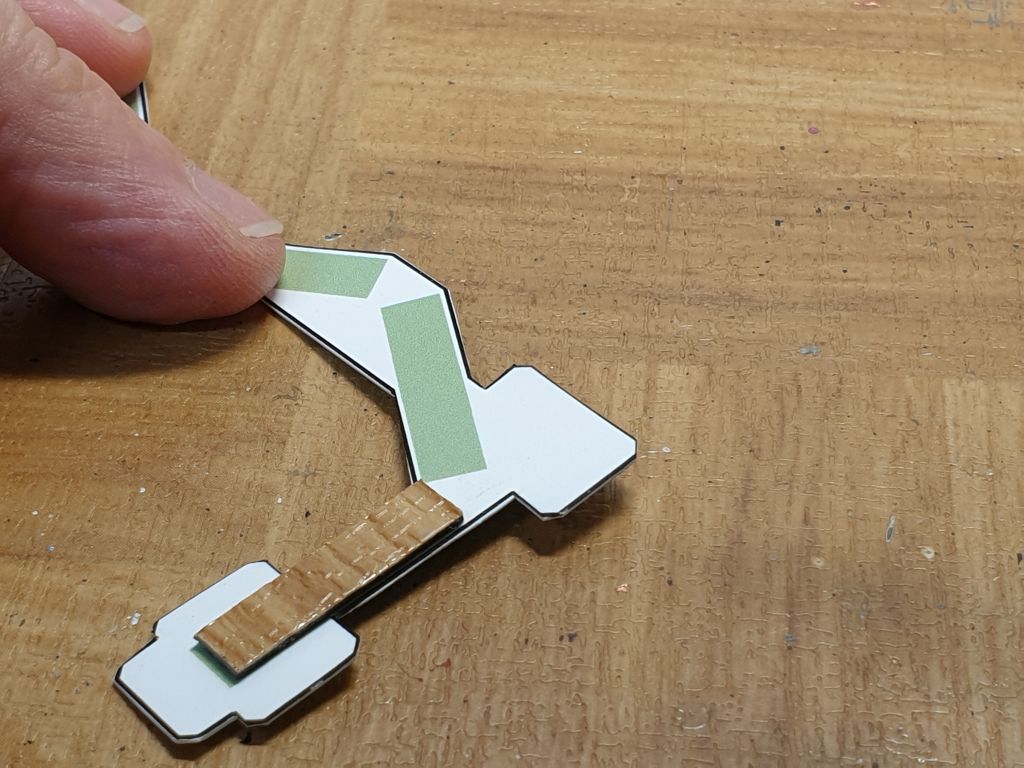
It is important to be as accurate as you can when adding the footings – keeping them within the green zones on the underside of the foundation. This will help to ensure a good fit with the Heroscape plastic bases.

A pair of completed foundations.
The top foundation is for a 3-Hex item, the lower for a 2-Hex item.

A completed foundation, now showing the upper surface.
Before proceeding, you should check that the foundation fits correctly onto Heroscape bases. If it doesn’t fit, check to see whether your printer has scaled the A4 template correctly. Also check that the footings are placed accurately inside the green zones.

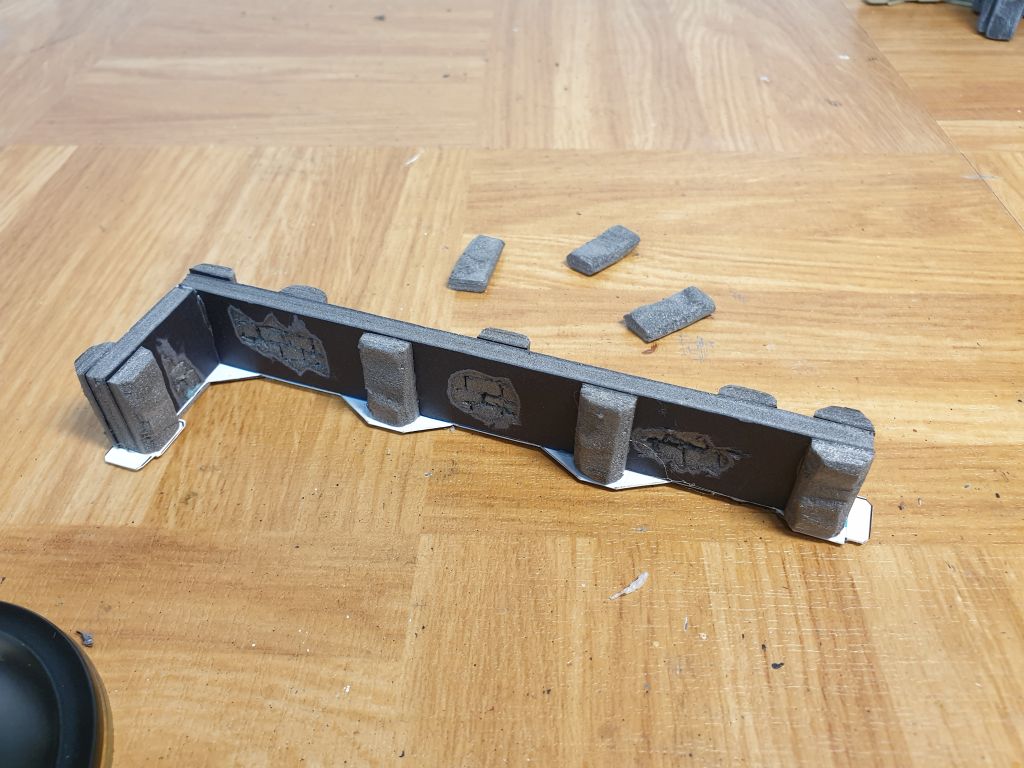
Next, prepare the walls from 5 mm foam board.
Start by cutting out rectangles of the appropriate size for your design – one long and one short segment to make an “L” shape for each scenery item.
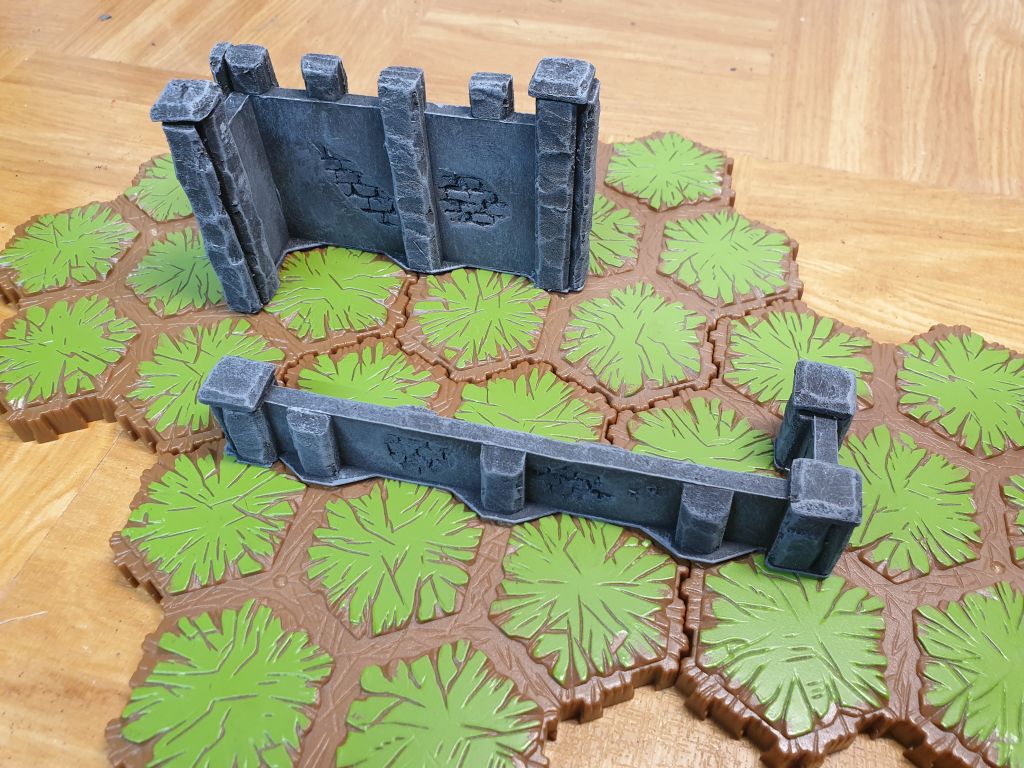
You can make the walls as tall as you wish. I made my low wall 2 cm tall, corresponding to a move hindrance of 3 for any model clambering over it (2 to climb up, 1 to drop down the other side).
My tall fortifications have a wall height of 5 cm. I expect this will totally block line-of-sight for all but the very largest miniatures on the table.
Whichever height you choose, the length specifications are:
3-Hex piece: Long segment = 137 mm, Short segment = 27 mm.
2-Hex piece: Long segment = 92 mm, Short segment = 27 mm.

(Optionally)
You can distress/texture the walls as much as you wish. Using a craft knife at a very shallow angle, cutting away the card surface exposes the foam underneath.

You can use any sharp or blunt implement to add your desired texture to the foam.
I found using a pin-vice made it easy to carve lines, creating a rough masonry or brickwork effect.

Cutting small star-shaped holes in the card surface can represent small-calibre weapon impacts.
This picture shows the effect after painting and drybrushing. Notice how the rough carving on the vertical buttresses nicely attracts the dry-brushed highlight colour

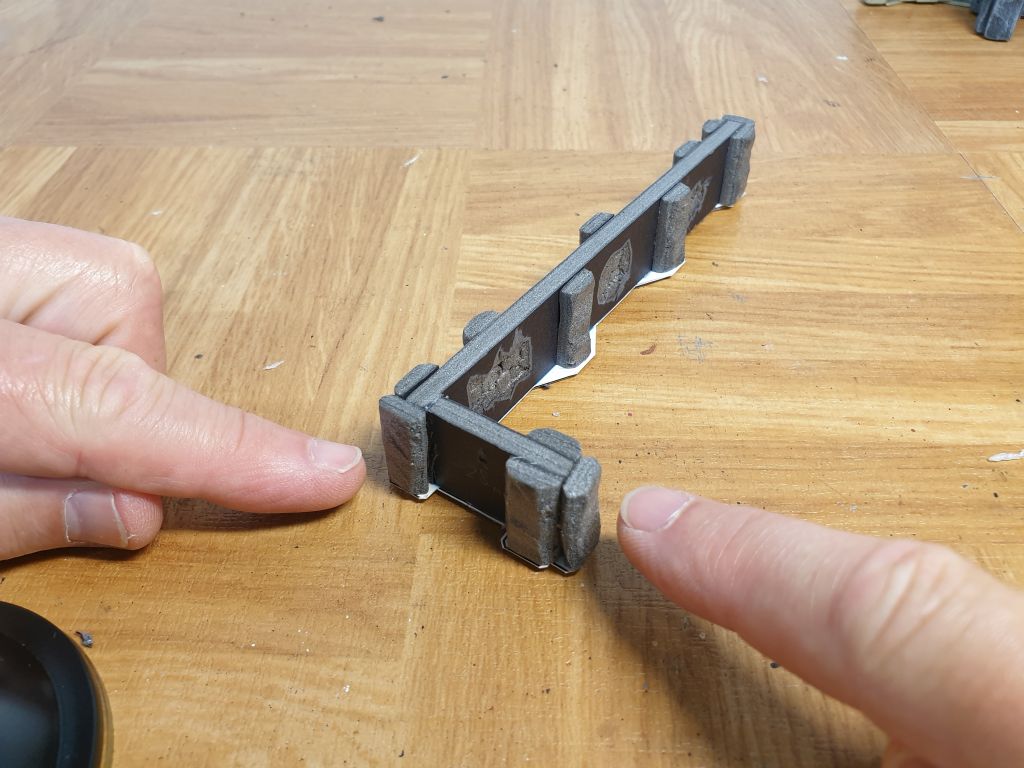
Once you have distressed your wall segments to the desired degree, use a hot-melt glue gun to trail a very thin bead of glue along the lower edge of the wall segment.

Attach the wall segment to the corresponding blue zone indicated on the upper surface of the foundation.

Then apply the glue to two edges of the shorter wall segment, and complete the “L”shape.
Notice how the foundation extends beyond the wall at locations showing where the buttresses will attach.

To make the buttresses, begin by cutting a strip of 5 mm foam-board that is 10 mm wide.
Using your craft knife, roughly carve away the top card surface, leaving a random granite-like texture on the foam. Carving from different angles and varying the depth slightly helps to create the right texture.

Then create a 45 degree chamfer down both long edges.
Again do this slicing of the foam roughly and randomly if you want an “ancient masonry” effect – or less roughly if you want a undamaged/ not time-worn effect.
You can also carve cracks and other damage into the buttresses if you wish.

Cut the buttresses to height, according to your chosen wall height. If the top of the buttress is to match the top of the wall, use the same height measurement.
If your buttresses are to be higher than the wall (the “crenelated” style), then cut the buttresses 10 mm taller than your wall height.
Use the hot-melt glue gun to add a dab of glue to the rear face and a small dab to the base of each buttress, then press into position against the wall in an alternating pattern as indicated by the foundation template.
End slabs can be prepared by slicing the card off both sides of the buttress piece.
This end cap nicely covers the ends of the walls, disguising the internal structure.

If the buttress sections protrude above the tops of the walls, you can cut away any excess to make it level.
Gaps matter less, since they can always be converted into damage.

There are many options for finishing the buttresses.
The simplest design is to just cut a 45 degree chamfer at the top.

End columns look nice when the buttresses are topped with a “cap stone”.
Make capstones in the same way as the buttress segments, but cut them from a 13 mm strip, and make them 13 mm square shaped.
Then slice away a small amount of the card from the under edges of the capstone.
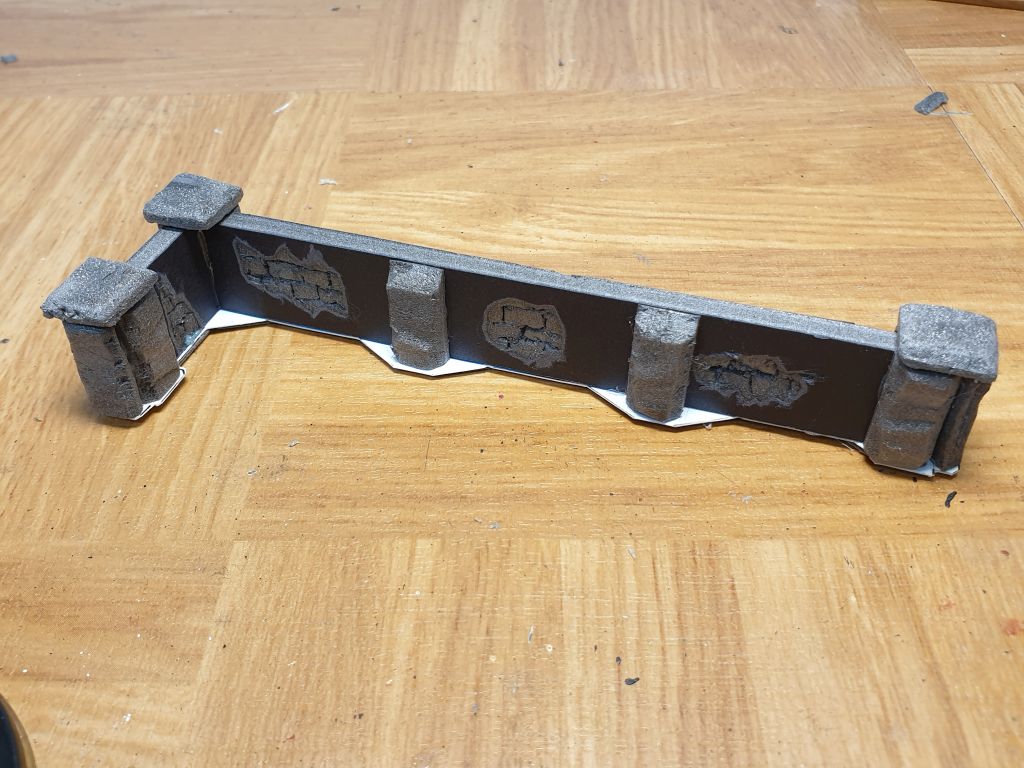
A completed low wall using both chamfers and caps.

If you want to make the fortification in the “crenelated” style, then cut your buttresses 10 mm longer than the wall height.

Then glue additional small blocks of foam-board to fill in the end posts, and glue additional small pieces of prepared buttress to fill in the exposed flat sides.
Carve away any excess foam to smooth out any places where the surface doesn’t quite match.
Add end pieces & capstones as before.

Paint all over with black acrylic. Don’t be tempted to thin down the paint with water to get better coverage – there is cardboard and paper here which will greedily absorb any excess water and warp as a result.
Instead, if any crevices have not received paint, wait until it is dry and touch in any such areas using a small brush.
Painting
Dry-brushing is a quick and easy way to finish the piece. If you are not familiar with the basic dry-brush technique, there are a number of helpful videos online. Here is one picked at random: https://www.youtube.com/watch?v=HvzZQdrMU0Q
Begin with a 15 mm / half-inch (ish) brush.
Use your black and white acrylic paint to mix a mid grey colour and dry brush the piece all over. I find that on the flatter surfaces, a “scrubbing” circular motion both clock-wise and anti-clockwise produces a good effect. Don’t worry if you get too much paint on the model, just rub it off with your finger. (Doing this deliberately actually can create a nice variation in the wall colour).
Next, clean your brush and mix a light grey colour. Again, dry brush this on, but using a lighter touch with the brush to hit only the raised portions and bring up a bit of depth.
Finally, using a slightly smaller brush, carefully and very lightly apply a very light grey (almost white) to just the raised/sharp edges – this to represent the specular lighting which will emphasize the 3D effect.
(Optionally) a coat of clear matte acrylic spray varnish will help to protect your model on the tabletop.

A 3-Hex 5 cm tall fortification with crenelated buttresses and end capstones.
