“Dragon & Virgin” (3D Render with Paint Shop post-processing)
(click to view in full resolution)
This image is the outcome of my attempt to make some progress with advanced techniques. Up until now, many of my 3D rendered images have suffered from the same flaw – they look flat and lifeless, plastic and unreal.
So recently I set out to learn a little more – not just about light and shadow, but about all the other (many!) aspects that combine to create a “painterly” quality in an image.
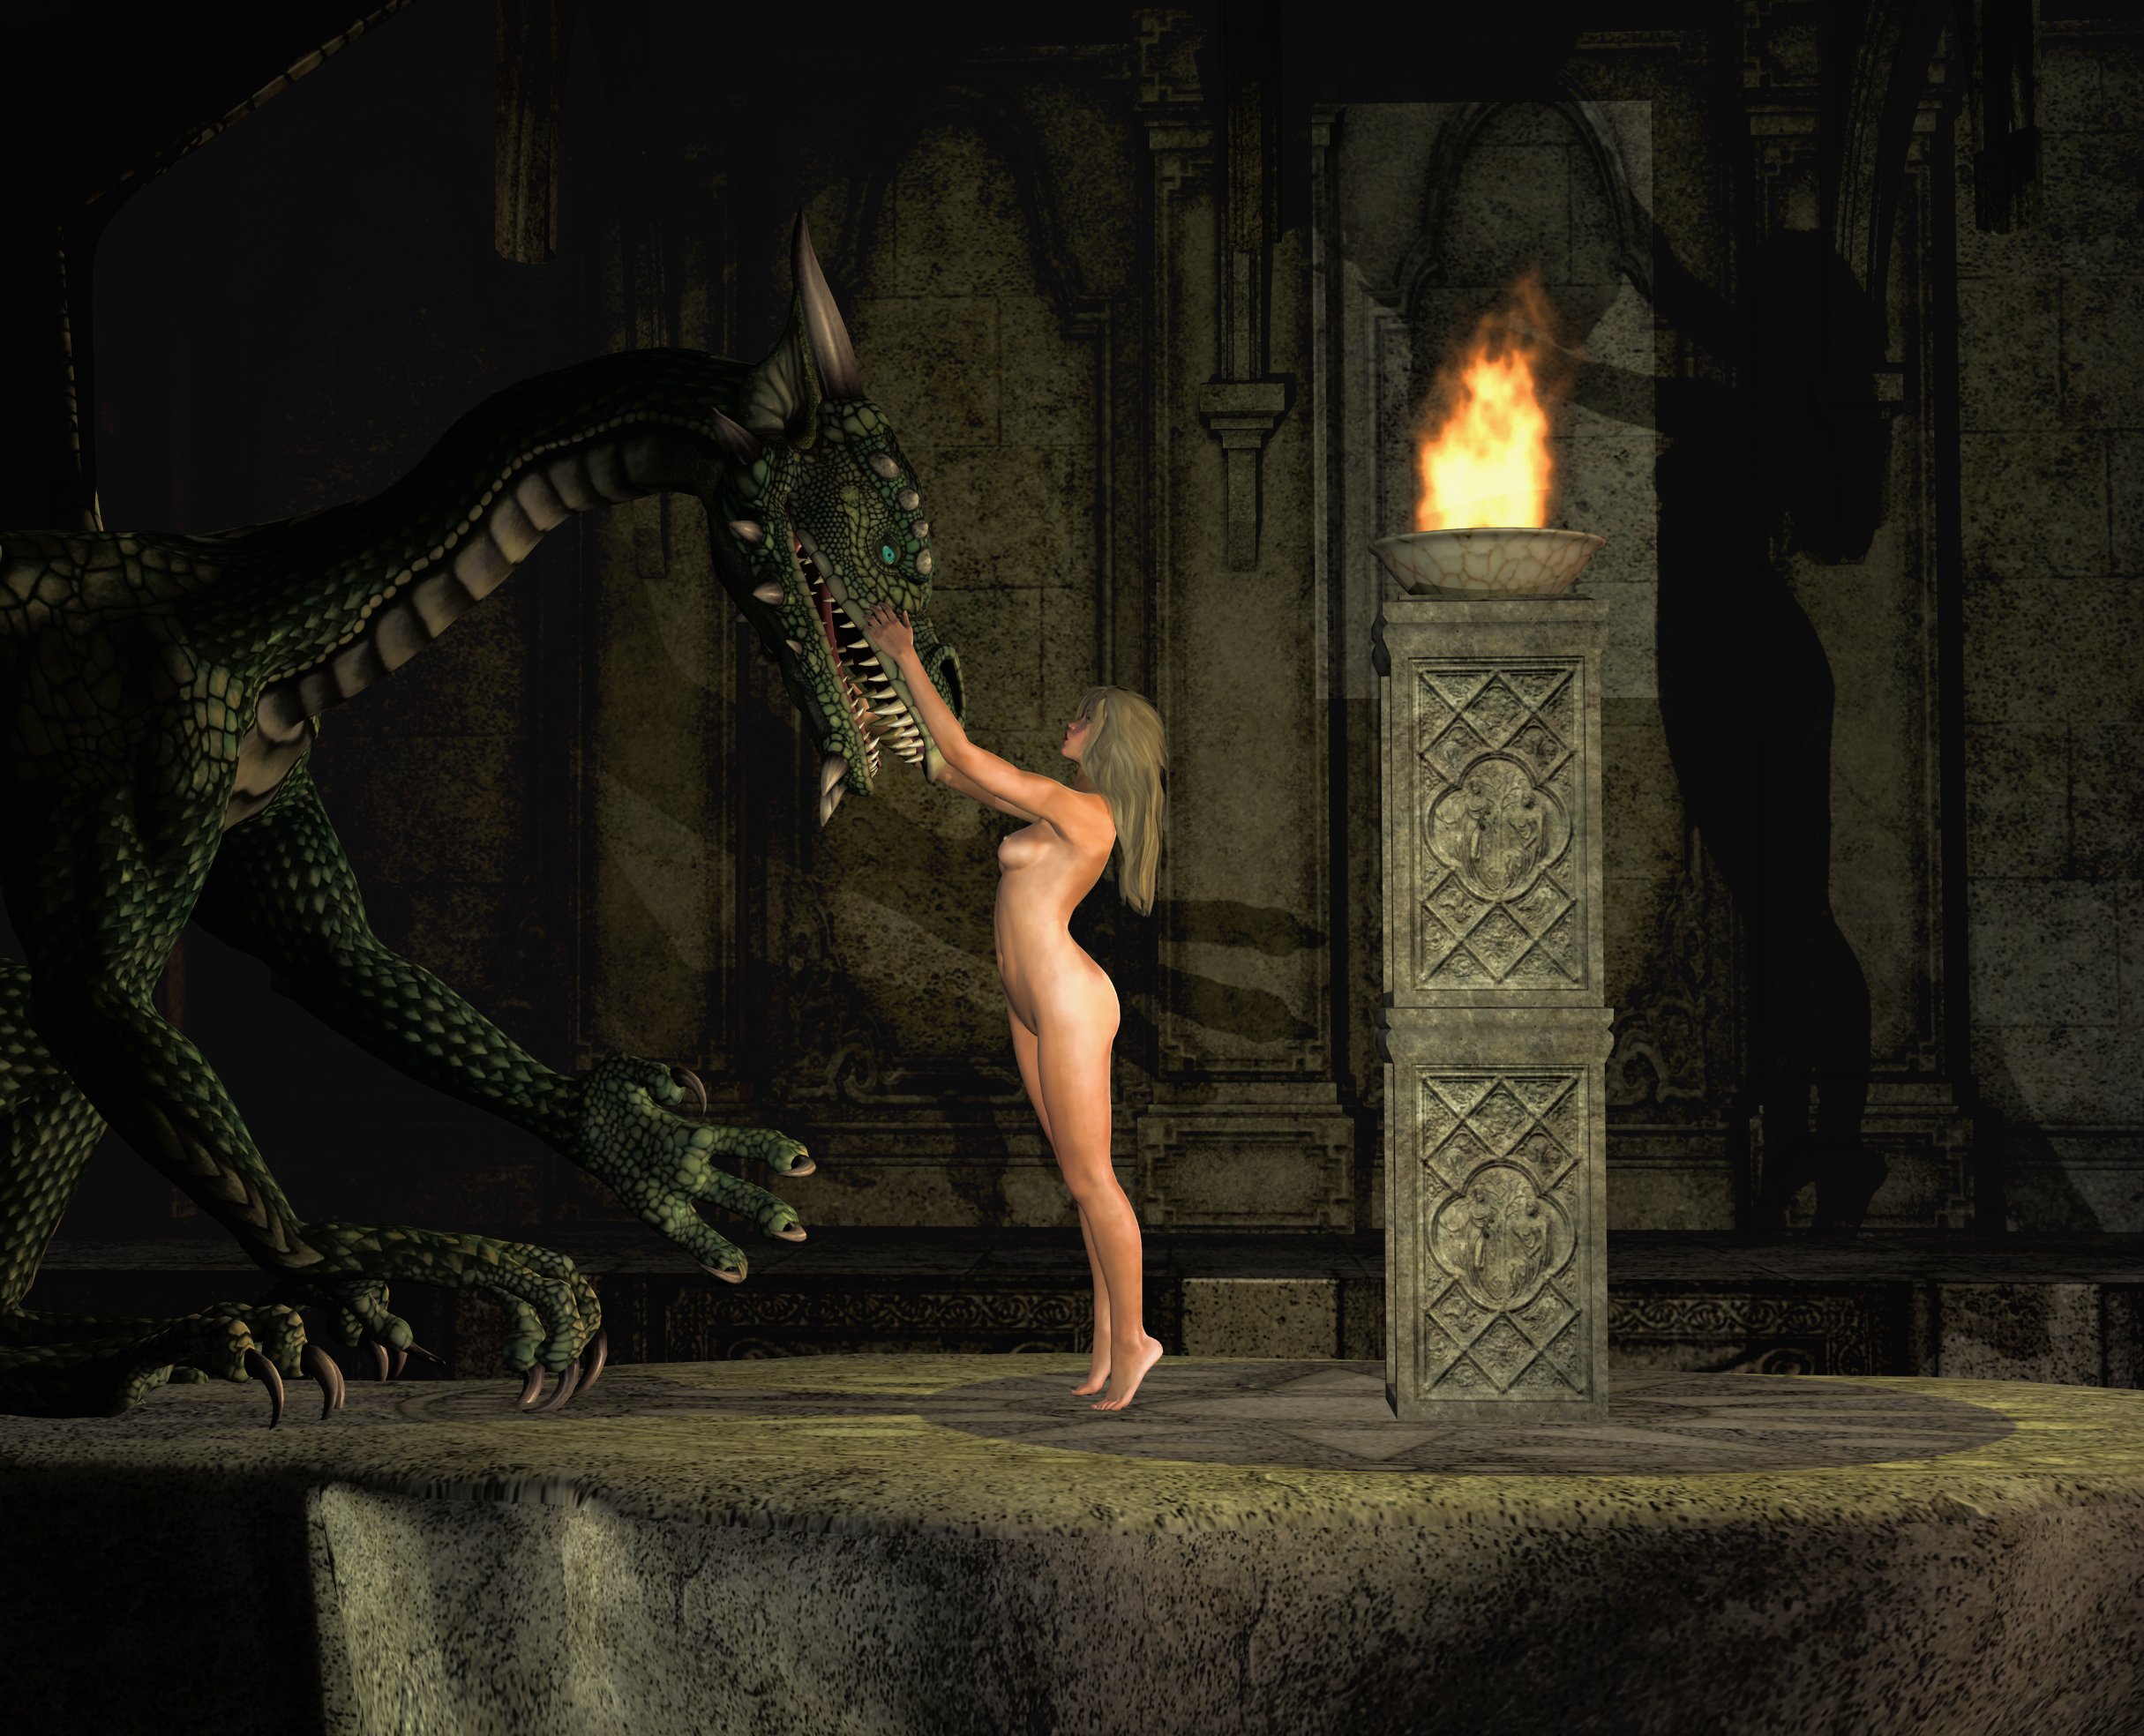
So with the above subject in the high fantasy genre I spent quite a lot of time (as usual) on rigging the models and adjusting the lighting and ray-traced shadows, and setting up the cameras. But then I also paid careful attention to surfaces, making sure the different surfaces (skin. scales, stone, etc.) had appropriate lighting models and levels of light reflection.
I then created four separate renders:
- The basic image.
- An image of just the three foreground figures (dragon, girl, pillar) against a “green screen” background.
- A depth mask (a monochrome image where the level of grey is proportional to the distance of the object from the camera lens).
- A fogged image (where the background is fogged out leaving the foreground sharp and in original colours.
Adjusting highlights, mid-tones and shadows for the whole image is very quick and gets close to the right look for the background; but, it messes with the foreground figures as well, so I used the green-screened version with blend type “screen” to restore the foreground.
I then overlaid the fogged version, and applied the depth mask onto the fog – thereby ensuring that only the background would go (progressively) more “foggy”. It is important not to overdo this, as I wanted a subtle effect.
Final retouching then included applying an “edge-preserving” smooth effect, some sharpening, and some contrast increase to ensure that the shadows were really dark where they needed to be.
I am happy with the result – I feel it has been a small forward step for me.
